Mastering single-flash studio photography: My techniques for flawless portraits
In the world of portrait photography, having the right equipment and techniques can make all the difference. Here's a guide to setting up a one-light portrait using a single flash unit, along with essential tips to create stunning results.
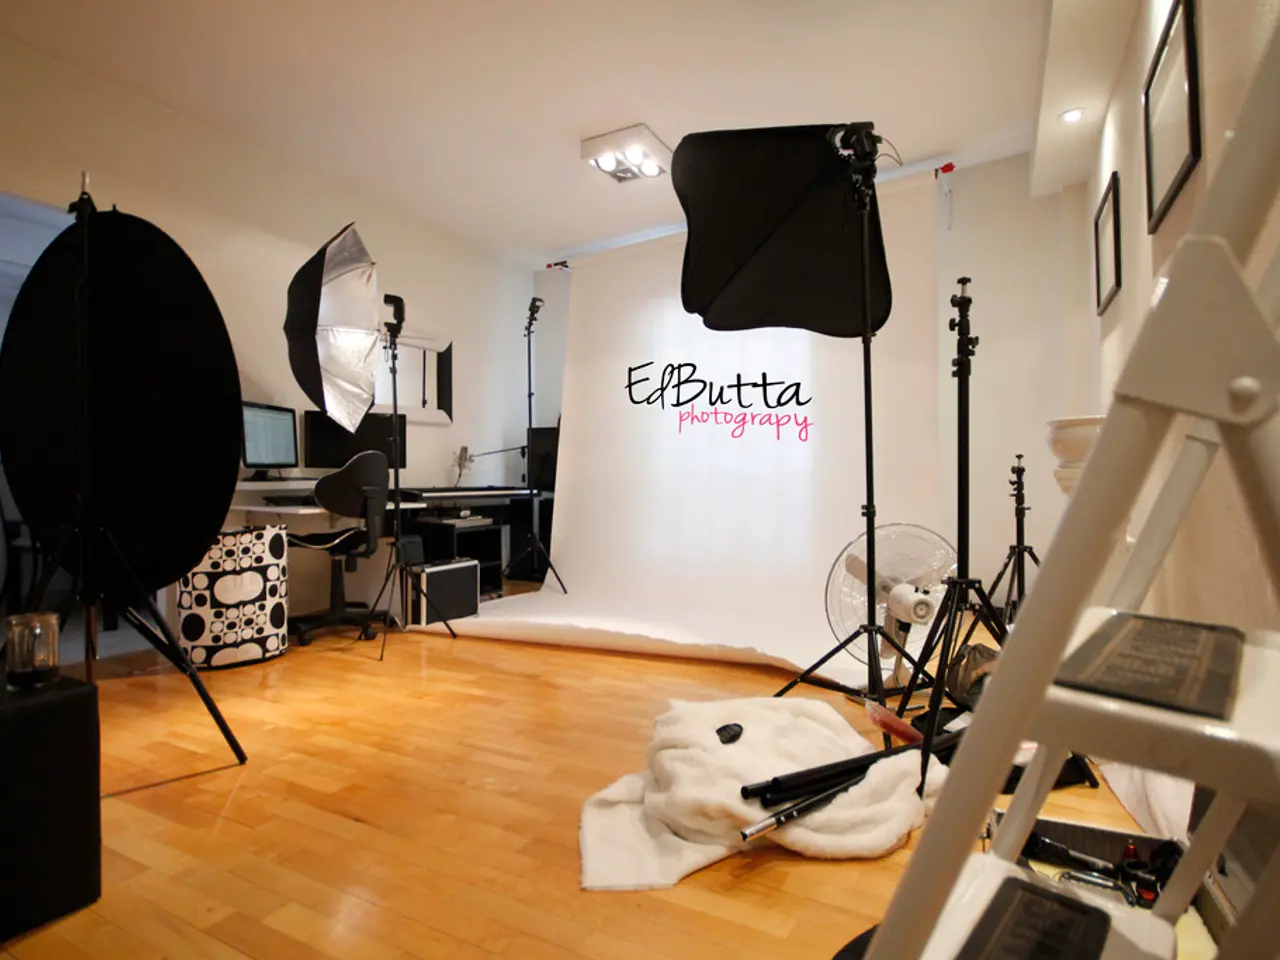
Essential Equipment
- Flash Unit: A studio flash head or a speedlight is ideal, complete with a modeling light for instant feedback, although test shots can suffice if a modeling light is unavailable.
- Light Stand: A sturdy light stand is necessary to securely hold the flash unit, often with a boom arm for top-down positioning.
- Light Modifier: A softbox or umbrella is crucial to soften and diffuse the flash, creating flattering, controlled light.
- Trigger: Wireless flash triggers enable remote control and firing of the flash unit.
Key Techniques
- Position the flash slightly above and to the side of the subject, often top-down, to create dramatic shadows and highlight facial contours. A boom arm can facilitate stable overhead light mounting.
- Use diffusion, such as a softbox fabric or umbrella diffusion panel, to soften the light and reduce harsh shadows, giving a pleasing, cinematic look.
- Feather light by adjusting the subject’s distance in and out of the light modifier's "sweet spot" to control light fall-off and shadow depth.
- Adjust the subject's head positioning to manipulate shadow angles and mood, from dramatic to soft portraits.
- Control background tone and separation by varying distance between subject and background.
- Optionally, use reflectors or V-flats to bounce light softly back onto the subject’s shadow side, for fill without adding a second light.
Varied Lighting Techniques
- Short lighting is achieved by putting the light at 2 or 10 o'clock, asking the subject to stand side-on, and lighting the side of the face angled away from the camera.
- Moody side-lighting can be achieved by positioning the flash directly side-on at 9 o'clock.
- The flash power can be adjusted to control the amount of light, without needing to adjust camera settings for different exposures.
- Lighting the subject from below at 6 o'clock can create an unnatural, 'horror movie' effect.
Additional Tips
- A light stand allows for precise placement of the light source in various positions around the subject.
- A softbox is an ideal light modifier for portraits, as it softens and diffuses the light from a bare flash.
- B&W Profiles in Lightroom and Photoshop's Camera Raw can be used for simple black-and-white treatments of portraits.
In Adobe Photoshop, adaptive presets can be found in Camera Raw or Lightroom, which detect facial features and apply targeted presets, while the 'Enhance Portrait' preset boosts facial features. The Skin Smoothing filter under Filter > Neural Filters > Skin Smoothing enables quick and subtle skin softening. For high-key backlit portraits, a reflector is used to bounce light back into the face, creating catchlights in the subject's eyes, and the softbox is positioned behind the head at 12 o'clock, creating a blown-out backdrop. Silhouette portraits can be created by training the light on the backdrop instead of the subject, leaving the subject in stark silhouette.
With these techniques and equipment in hand, you're well on your way to capturing stunning one-light portrait photographs. Happy shooting!
- In portrait photography, a studio flash head or a speedlight with a modeling light is essential for instant feedback, though test shots can suffice if a modeling light is unavailable.
- A sturdy light stand is necessary to securely hold the flash unit, often with a boom arm for top-down positioning.
- A softbox or umbrella is crucial to soften and diffuse the flash, creating flattering, controlled light.
- Wireless flash triggers enable remote control and firing of the flash unit.
- Position the flash slightly above and to the side of the subject, often top-down, to create dramatic shadows and highlight facial contours.
- Use diffusion, such as a softbox fabric or umbrella diffusion panel, to soften the light and reduce harsh shadows, giving a pleasing, cinematic look.
- Feather light by adjusting the subject’s distance in and out of the light modifier's "sweet spot" to control light fall-off and shadow depth.
- Adjust the subject's head positioning to manipulate shadow angles and mood, from dramatic to soft portraits.
- In the world of photography, having a one-light portrait setup, complete with a flash unit, light stand, light modifier, trigger, and essential techniques, can make all the difference in creating stunning portrait shots.


